Materials needed for both pillows:
(2) 14" pillow forms
1/2 yard of linen
1/2 yard of spring quilting cotton
1 yard of light weight fusible interfacing
large scraps of fabric for the faux chenille eggs
(2) invisible zippers
Step One: Cut out (2) 14" squares of linen and (2) 14" squares of the cotton fabric.
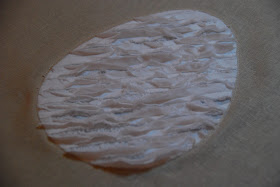
Step Two: Create your applique shape template. For this pillow I did a single extra large egg. Now pick out the fabric you will want to use as the applique. Stack four layers of the fabric, making sure the applique shape will easily fit within. Next draw 45 degree angle diagonal marks every 1/2 inch apart (see photo below). The lines are closer in this tutorial and it will make for a fluffier chenille.
Step Three: Sew down every marked line. Cut end to end down the middle of each marked line, only through the top three layers. Do NOT cut through all four layers. There is a chenille cutter on the market that is perfect for this task, but it is not necessary for this small project.
Step Four: Take a chenille brush or unused toothbrush and severely agitate the freshly cut fabric. I find it helps if you squirt a bit of water on the fabric while you agitate. Isn't that fluffy goodness.. love it!
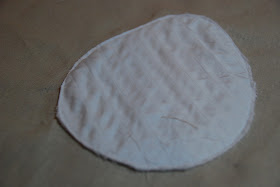
Step Five: With an erasable pen, sketch your applique shape on the front cover. Place the faux chenille behind the front cover. You will have the chenille right side up against the wrong side of the linen.
Step Six: Pin the faux chenille to keep it in place.
On only the linen, cut out the egg shape. With a satin stitch, sew down the border of the egg shape.
Step Seven: On the back of the cover, cut away the excess faux chenille fabric.
Step Eight: Cut out (4) 14" squares of fusible light weight interfacing. Iron on the to the wrong sides of both covers and backs.
Step Nine: Free motion quilt "the good egg" and the "the bad egg" on the pillow covers.
Step Ten: Install the invisible zippers on the bottoms of the covers. Then pin the front & back covers right sides together. With the zipper unzipped about halfway, sew around the perimeter with a 1/4" seam allowance. Cut the corners up to the stitching line and pull it right side out.
That's it! Super easy and so much fun..
If you like the look of free motion sketching, you have to come back tomorrow! I'll show you how to convert a hand embroidery pattern into free motion, crayon tinted fun..
Sharing this tutorial at:


Very cute - good egg, bad egg!
ReplyDeletevery good turtorial
ReplyDelete