
Are you excited? I am! I have been wanting to make pillows for a long time. However I was afraid of zippers. Granted you can create pillows several different ways, but I always thought a zipper cover was the most professional looking. Earlier this year I learned how to install an invisible zipper easy peasy. The best online tutorial I can refer you to is Sew Katie Did. Seriously that Coats & Clark $2 foot is amazing! I have it on one of my older sewing machines and it has officially become the zipper machine. Now Katie and my guild friend both placed their zippers on the bottom. If I have a fancy back then I do place the zipper on the bottom, but in many cases I'll actually place it the middle of the back.. I think it lays better, but that's just my two cents.. OK, on to the tutorial!
Today I am going to show you how to make this lovely shabby chic pillow cover. You could use this technique for any reverse applique shape, so please experiment and have fun!
Materials needed:
14" pillow form
1/2 yard of linen
1/2 yard of light weight fusible interfacing
large scraps for the eggs
ric rac trim

Step One: Cut (2) 14" squares of linen fabric.

Step Two: Create your applique shape template. For this pillow I did a basic egg. Now pick out the fabric you will want to use as the applique. Stack four layers of the fabric, making sure the applique shape will easily fit within. Next draw 45 degree angle diagonal marks every inch apart (see photo below). I use my cutting mat, ruler, and erasable marker to create these lines.

Step Three:Sew down every marked line. Next cut end to end down the middle of each marked line, only through the top three layers. Do NOT cut through all four layers. There is a chenille cutter on the market that is perfect for this task, but it is not necessary for this small project.
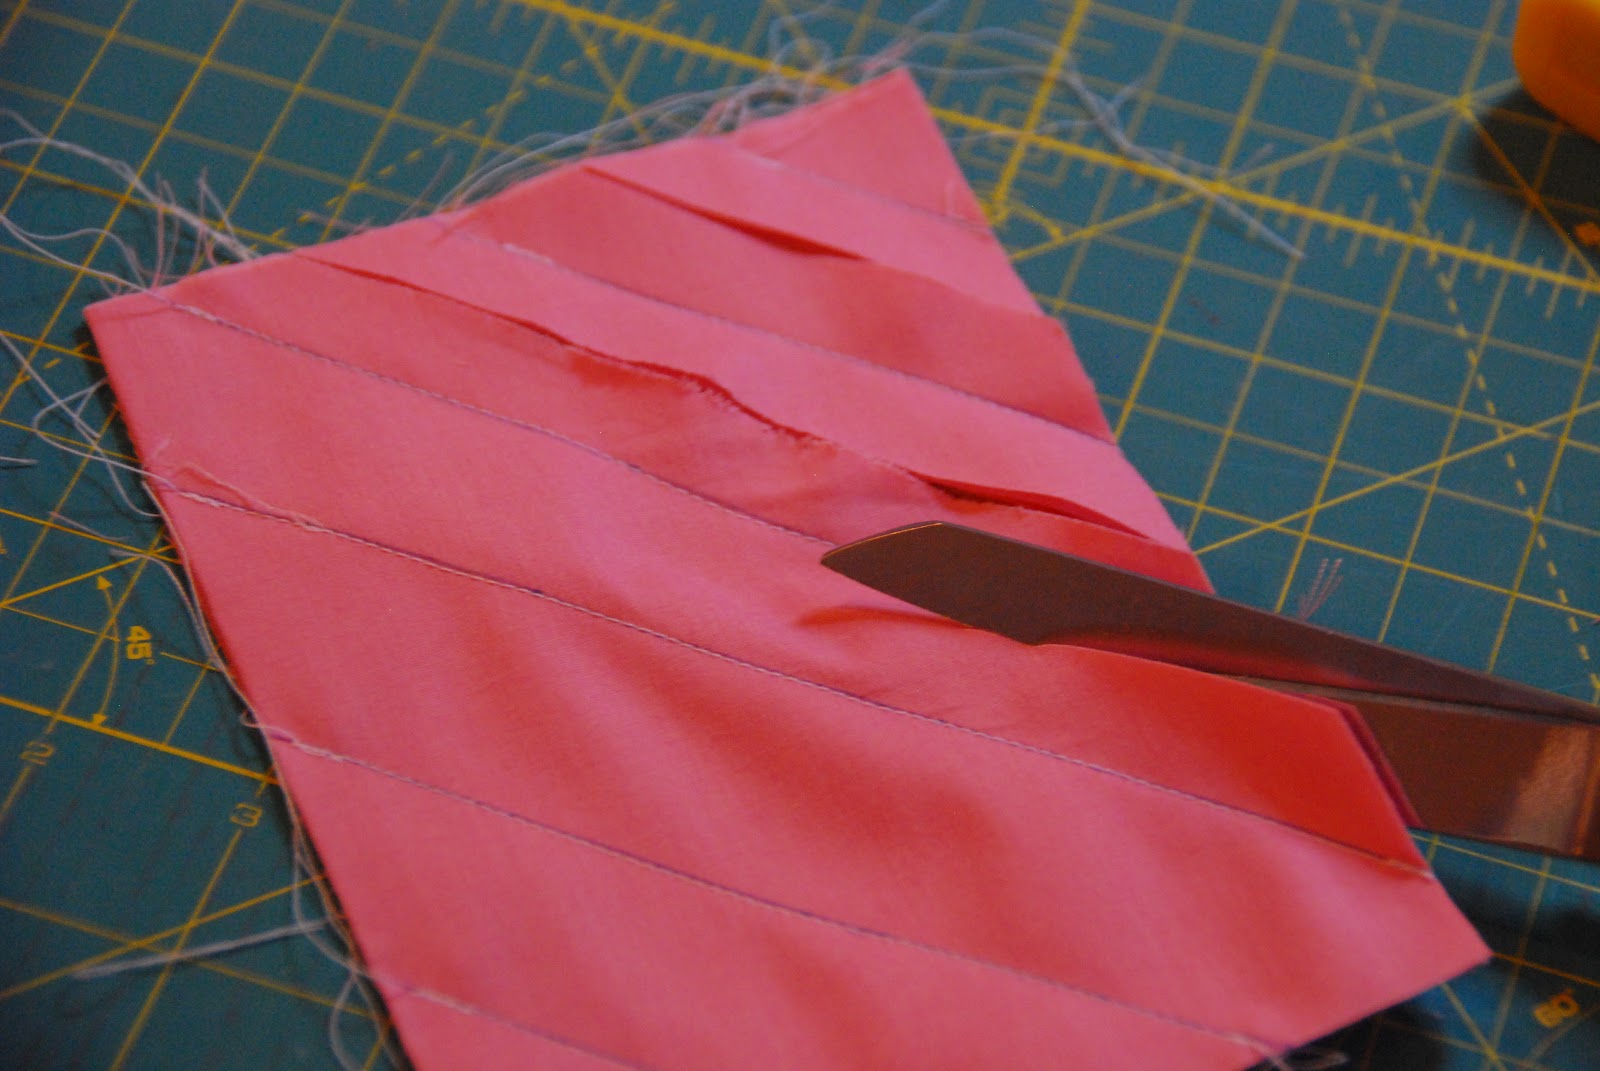
Step Four: Take a chenille brush or unused toothbrush and severely agitate the freshly cut fabric. I find it helps if you squirt a bit of water on the fabric while you agitate.

Step Five: On the back of applique fabric, draw out your egg shape and cut.


Step Eight: I really like the sketchy look of free motion quilting, so I went crazy with it. You can either free motion around the applique border or use your regular sewing foot. The most important thing is to be sure the you are sewing down through the linen cover and catching the applique.

Step Ten: Cut out (2) 14" squares of the fusible light weight interfacing. Iron interfacing on the wrong sides of both the front and back cover. Next finish the edges of the front and back cover by either running it through your serger or use your sewing machine's zig zap stitch. (This is not imperative, but it makes your pillow more professional..)
Step Eleven: Again, I highly recommend checking out Sew Katie Did's tutorial on adding a zipper. That is exactly how I do it and she explains it very well.

Have questions? Let me know! Come on back tomorrow to see a paper piece quilted cross pillow. It's gorgeous for Easter, but would also make a very sweet Baptism/Blessing/Christening gift.

5 comments:
Aww this is so cute! What a simple but sweet project for Easter! Very cute!
That is darling!!!!! Great idea.
This is great! I hope you'll link up to my Hippity Hop Easter Project Hop.
http://www.itsybitsypaperblog.com/2012/03/hippity-hop-easter-project-hop.html
Super cute!!!
Jennifer, these are so cute!
Post a Comment