Saturday, April 30, 2011

Barnyard Party!

What an amazing morning Isabelle and I had! Her friend, Gracie, had a birthday party at Wheeler Farm. And even in the snow and mud (yup people, a day before May..we have snow) it was the most amazing barnyard themed party!

Gracie's mom went far and above when it came to decorating, activities, and favors. I'm going to have to step up my game! Check it out..
And this is what you see at every 3 year old's birthday party..... a blur of motion.
And what is the only thing better than running around like a monkey with your friends? Your own bag of duck food of course!

(I got bit by a duck! Seriously I'm so Charlie Brown it is ridiculous sometimes...)
And what is the only thing better than feeding ducks at a pond?
Riding a pony of course!
What is the only thing better than riding a pony?
Riding another pony of course, you silly!
And what is the only thing that could top off 2 pony rides?
A tractor ride with your pals..
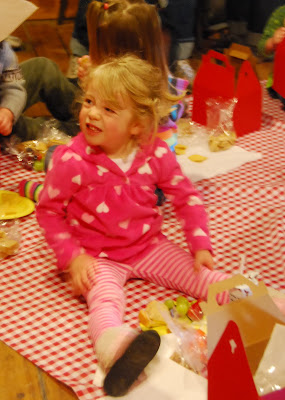
And every good tractor ride deserves to be followed by an indoor picnic with your own box lunch!
What's for dessert? The most adorable barn cake & animal cupcakes!

After cupcakes, it is only fitting to be sent home with a farmer hat and bucket completely full of handcrafted barn games, suckers, book and more..


Last but not least.. what could top such a bounty of gifts?
To be muddy, happy, and tired..


HAPPY BIRTHDAY GRACIE
AND
THANK YOU FOR HAVING US!


Saturday - Personal Projects

Wow - I only have 1 personal project to show you today. I guess I really didn't have too much time this week for *me*. I am finishing up a dress for myself from a sew-a-long. I had hoped to finish it for Julie's baptism, but time ran away with me. Now my hope is to finish if for Mother's Day; my mother & I like to have professional photos taken each year. I will be making the girls dresses too. Hopefully I can post the pictures of those dresses next week.

In the meantime, here is my latest peek-a-boo lamp design. Truly inspired by Isabelle. If you raised/raising a toddler, then you completely understand. It truly has just been one of those weeks.

I can't share the file for the frame (it's from Silhouette), but if anyone would like the text file - just let me know! It was a bit fiddly since the words are so small. I actually had to get out my super duper lamp/magnifier to repair some of the letters. But I wanted this sooo bad, it was worth the time.
We are shopping right now for a camping trailer. We are sooo excited. I imagine we'll be gone most of the summer weekends if we have it our way. And well, a new "home" means new quilting projects! I'll have to make some blankets, pillows, curtains,and I'm sure some new embroidered art for the walls..

Do you know about the Quilting Gallery? I recently joined and it is the best site! I love swaps and recently signed up for the fabric basket one. Right before the Easter holiday I received mine from Sharon. All I can is wow!! I love the basket. She absolutely got what fabric makes my heart go pitter patter!! Check out this basket..

And if it weren't enough that I received the cutest bag on the block, it was chock full of fat quarter yumminess. Some serious fabric people..

Look here..

and here...
and here..
What an amazing swap giver!! I can not say enough about how much I love this and what it meant to me to receive. Thank you, thank you, thank you!!

And here are some parting pics of Thing 1 & Thing 2..


Be sure to come back tomorrow for my sewing pattern review of the cutest baby romper ever! Lots of pics of Julie's yummy chunky thighs and adorable smile..

Friday, April 29, 2011

Freebie Friday - Cinco De Mayo Banner & Free Ad Space


Cinco De Mayo is just around the corner! I know it may not be a huge holiday here in the U.S., but my husband's family is from Mexico... and well we just like to find a reason to party! And now you can add a little fiesta to your week with this adorable & free Cinco De Mayo printable banner.

I had soo much trouble finding the right angle for the pictures. They just don't do it justice. The banner is a ton of fun and won't take you much time. I just cut out the circles, adhered them down to a large length of brown ribbon, and hung it up in our kitchen.

Here are a few more pictures...
I would love it if joined you my blog if you decide to print it - that way I know you liked it and want more! Also it will help you stay connected to me and know about the next best freebie!

Now go have a fabulous fiesta and don't forget the margaritas...

***

Are you interested in some *free* advertising? Each month I will rotate 6 ads on my blog. It is a first come, first serve basis. Please leave a comment with your email that you are interested.

This awesome deal will go on till my blog reaches 300 followers...

***

Have a fabulous Friday!

Linking Up To:


Wednesday, April 27, 2011

Tattoo Art Inspired Wreath

I love tattoo art. I don't have a single tattoo on my body, but I'm always fascinated by it. I know that for a lot of people it's considered rebellious..even low class. I think it is art personified. To think that a piece of artwork meant so much that someone wanted it etched in their skin - what an amazing idea. Maybe one day there will be an image that means enough to me that I would want it on my body forever.. I haven't found it yet.

One of my all time favorite tattoo images is the iconic "Mother" heart. And now I have it hanging on my door for Mother's Day..
Aw.. isn't it fabulous?? If ya'll want an in depth tutorial, just holler...

Visit thecsiproject.com
Today's Creative Blog

WoW 17 - Details for #18

For this week's WoW, I challenged you to do something better for the Earth. Any type of recycling, upcycling, planting a tree, etc.. As artists we have the skills to look beyond an item's face value and find something more. We have the skills to create items that many people have to purchase.

If you have toddlers, you probably own stock in Ziplocs. You need them for everything! I get pretty tired of buying them every week and we finally bought a HUGE box of the sandwich size ones at Costco. Ugh - what a waste of money and detriment to the environment!

I had seen tons of the fabric reusable bags on Etsy for awhile now, and thought that would be a great start to end our excess of plastic. Here is the pattern I found online and used for this project. Really great pattern and took me minutes to whip up. Here is my Nemo inspired reusable snack bag- perfect size to hold goldfish crackers!


Isn't it adorable? Seriously took me less than 30 minutes to make this. I'm going to sit down this summer and plow through a ton. They are fabulous for playdates and to pack in Isabelle's lunch box.

And I had another thought. Just about every toy you buy for toddlers these days comes with a gazillion parts and no bag to store them it. So we buy a TON of gallon sized plastic bags too. I'm going to make these bags a lot larger and I can toss her toys in the them. One for cars, one for doll clothes, etc,..

What did you make for WoW?
Kathleen make these awesome raised flower planters out of unused drain tiles. This is such a creative idea! Never would anyone imagine that those were a recycled craft. I love that these are also raised beds - I hear that helps a lot with gardening. Love them Kathleen!


WoW Challenge #18
Where would be without our dear Mothers?
With Mother's Day just around the corner, let's celebrate those amazing women that helped us along the way. It can be in honor of your mother, grandmother, godmother, or any woman that may have filled that role in your life.

Want to join in on the WoW challenge?
Post your project to linky tool below before midnight (MTN) of next Tuesday.
Want more details on WoW - go here.

Linking Up To:

Iron Craft #17 - Weddings

This week on Iron Craft, we were tasked with the theme of "weddings". Since our 6th anniversary had just passed, that was fresh in my mind. And then I was thinking of how I have multiple wreaths for just about every occasion under the sun, except for our anniversary.

I decided to make a wedding/anniversary door wreath. This would be great to hang at reception or for us during the month of our anniversary.

I was completely inspired by this Etsy item here. Isn't that super cute? And I had all the materials to make something similar.

Here is my interpretation...


It's just a piece of thin wood, vinyl letters, a nest, plastic eggs, and some little birds (which are way out of proportion to the eggs..but I'm hoping the distance helps reduce that..)

I absolutely love it! Right now I have it on our bedroom door. Yup, I hang wreaths from just about every door in the house.. It's an addiction. And I'll have another one to show you tomorrow..

**And please don't misinterpret the third egg in the nest. We have 2 kiddlets. No baby on the way, no bun in the oven - simply there for design purposes only! After my eldest locked me out of the house for 30 minutes in the rain on Monday.. I can just about guarantee that we are done**

Linking Up To:
Visit thecsiproject.com

Tuesday, April 26, 2011

Restoration Hardware Knock It Off - Monogram Rug

Time for me to jump on a blog trend craze - painting rugs! Rugs can be soo expensive, but they add so much to a room or even a patio. Painting an inexpensive rug is the perfect answer for those looking to update their home without dropping a bundle. Today, I'm going to show you how I spent $31.00 to make a rug inspired by the one below with a *sale* price of $79 at Restoration Hardware.


Materials needed:
Egeby rug from Ikea - I cut mine in half so I had two rugs in the end
2 sample paint jars of Martha Stewart latex wall paint - a pink and brown
(you can buy these at Home Depot - they will mix the colors to your preference)
painting tape and brushes
*a little bit of brown spray paint
vinyl monogram stencil

How long you will need:
2-3 hours

What do you do:
1.) I cut my rug in half and removed the binding. (I used the other rug for another knock off project that I will feature later this month)

2.)I masked off the center rectangle with painter's tape. I measured the sides to be sure that is was pretty accurate.


3.) With a mini roller, I did a couple coats of pink latex paint for the middle rectangle.

Here it is finished - looking great!
4.) The next part I don't have pictures for.. I used the chocolate paint and did a couple coats on the border. For some reason the border was a lot harder than the inner rectangle. I didn't have a mini roller & pan for the brown, and used brushes instead. Bad mistake. I highly recommend getting roller & pan set for each color you use - they were less than $2 at Home Depot and make a huge difference. I ended up using some left over spray paint to even out the color on the border.


5.) I then used my Pazzle electronic cutter to cut a vinyl stencil out for the monogram. Now the vinyl won't stick great, so just go slow when you paint. I used a foam brush and heavily painted the monogram.


And that's it! I love it! It's going to go in Juliette's room under her crib - just like they have pictured at Restoration Hardware.
I hope you are inspired to try to paint a rug this summer. I'll be honest there is a learning curve and I did utter some unsavory words, but I really love my rug.

Have questions? Just holler!
Have a Knock It Off suggestion? Please let me know!

Next week we will be making this beauty.... I'll show how to make the rose petal one and give suggestions on variations for boys.

Linking Up To:

Monday, April 25, 2011

WIPS For This Week

Hope everyone that celebrates Easter had a wonderful weekend. We had so much fun with family and friends. My mother & I opted out of cooking a big meal and went out to brunch - hand's down *the* best idea! Amazing food and no clean up..

Unfortunately a number of my WIPS don't have pictures that I can show..yet..

I'm working on a tutorial for CSI!! I am soo excited.. I will reveal more soon..

And I'm test driving a pattern for Tie Dye Diva. A super cute romper for the babies..
Pictures and a pattern review are in the works..

So what can I show you?
I'll show you a peek at my knock off rugs!

I've tried painting rugs with hobby paint, wall latex paint, and spray paint..
I'll give you the low down and tutorial tomorrow!

What do you have in the works??

Sunday, April 24, 2011

Sunday Sewing Pattern Reviews - iSew's Coupon Organizer

This week I'm reviewing iSew's Coupon Organizer pattern. My best friend is a coupon queen, and I know with the extreme coupon TV show lots more people are getting in to deals. I used the binder method before I had kids, but now the idea of lugging that beast around in addition to my kiddlets makes me break out in hives. I thought this would be lovely to have instead.

There are some aspects I really love, but I'm not thrilled with my first one. It's possible I was not as precise as needed and I'm going to give it one more shot.

Here is my end result...


Description of pattern: "I searched around for a completely handmade coupon organizer on Etsy and didn't find one, so I made my own. Now you can make your own too."

Level of Difficulty: iSew labels it for intermediate and I heartily agree. Measurements need to be very precise, there is both machine and hand binding, and optional quilting of the main body. I do think that advanced beginner quilters would be able to do this pattern without too much
trouble.

Fabric Recommendations: I used 3 high quality cotton fabrics and was very pleased. You may wish to experiment with some of the heavy weight home decorating fabrics as well.

Overall Design: I love the quilting and multiple use of fabrics. I love that it is compact and easier to use with kids in tow. I'm not thrilled with how much gap there is at the bottom of the dividers. Again, this could be because I was not as precise as needed. I'm going to make a second one to try it one more time. With these more advanced patterns it is a good idea to make a muslin, but I jumped in without looking.

Instructions: Very clear, lots of photos, and I didn't find any grammatical or detail errors.

Pattern Pieces: This is a PDF (my personal preference) so you'll be printing them out. Self explanatory and shouldn't cause you any trouble.

Modifications & Tips: Don't make this one in the wee hours of the morning when you're tired and trying to get it done before the kiddos wake up ;o) I think that's where I had some trouble. Close enough stitching is not going to work with this one.

iSew also recommends finishing the binding by machine, but I disagree. Hand stitching this small of an item won't take you much time and will give you a much cleaner appearance. After all that hard work, don't let it look sloppy by rushing the end.

Conclusion: This was one of the only coupon organizer patterns out there. It is very tailored and allows for a fair amount of personal creativity with the quilting and multiple fabrics. I would recommend it for someone that is very confident in their sewing abilities or is looking for a challenge.


**iSew did not compensate me for this review in any form. Unfortunately I don't have a discount to give readers this week for their shop. I do recommend checking it out though!

Do you have a pattern you would like me to review? Are you a pattern writer? Please comment on any pattern suggestions - always looking for more!

Next week I will be reviewing an adorable baby ruffled romper - perfect for summer..

Saturday, April 23, 2011

Saturday - Personal Projects

I've kept a few of my personal projects under wraps. This past month I've been busy making gifts for friends and family for different occasions. I never have a good idea of who is reading my blog and I hate to spoil surprises. As the gifts are delivered, I will reveal the fun projects on the blog.

First up a sweet little onesie I made for a friend's daughter. I've been wanting to make this for her and I'm appalled at how long it took me to get around to it. Eleanor is no longer a bitty baby, but luckily she is still in onesies!
My friend is a huge Prince fan. If you ever want to get her on the dance floor, just put on any of his tunes, and out she'll go! In her honor of her adoration, I created a girly Prince inspired outfit. I used my Pazzle to cut out the the symbol on freezer paper. I then ironed on the paper and applied lilac fabric paint. Once it was dry I added some bling to top it off.

And what girlie onesie is complete without ruffles? I stacked on 3 different purple fabric ruffles on the back for a super cute tushie! I hope she loves it..

Next up was a free motion applique project I had been dreaming about for awhile. My parents have been considering getting an Airstream for traveling back and forth. I thought until they buy it, I would give them a mini version of their dream.
To be honest, it was soooo hard to part with this. It came out exactly as I had sketched it and I love it to pieces! Considering it was my mother that lead my creative path, I knew she would love it as much if not more...

And there are my crazy monkeys! The girls are so in love with each other it warms my heart. Isabelle would sleep in Juliette's crib if I let her.. The are super excited about Easter and can't wait for those eggs full of chocolate.

Juliette is rolling all around and is trying desperately to crawl (though she hasn't yet!) She just celebrated her 6 month birthday. It breaks my heart how fast she has grown, but we are having the best time with the girls.

And I've debated discussing this on the blog. I suffer from the over-share syndrome, so I'll keep this brief unless any of my readers would like me to cover my experience in more detail (I'm happy to share if it is of interest) I recently saw my doctor to see if I was suffering from post-postpartum depression. I've never battled depression in my life, but I had seen many friends and family go through it. Though I wasn't sad per se, I had a very short temper, my OCD was getting out of hand and I always seemed to be feuding with Isabelle. After talking to my doctor, friends, and family I decided to not take medication. I'm not convinced it was depression. I think I was allowing myself to be incredibly sleep deprived (less than 6 hours a day) and I had not been taking my prenatals and extra vitamin D (my levels dropped way low during pregnancy). Now that I'm taking better care of myself and have become mindful of when I'm getting too stressed, we are all so much happier! Granted raising 2 little ones is not easy, it no longer makes me want to run for the hills. It is like when you're flying in a plane and they remind you to put the oxygen mask on yourself before you assist others... My oxygen mask is on and life is better..

Hope ya'll have a fabulous Easter weekend! And to all you Super Moms, remember that we can only be Super when we remember to be good to ourselves..

.

Related Posts Plugin for WordPress, Blogger...