
Showing posts with label sewing. Show all posts
Showing posts with label sewing. Show all posts
Friday, May 9, 2014
Make your own Camera Strap! | ADORNit Video
Still need a Mother's Day gift? Come check out my camera strap tutorial video that I created with AdornIt! Super easy and a great gift for all mothers!
Thursday, October 4, 2012
WIPS this week
Near the end of last month it dawned on me that in the space of two weeks I had Baby's 2nd birthday, Sewing Summit, and a big Disney trip. All wonderful! Except I'm that crazy loon that thinks each event needs all kinds of handcrafted items. Gah!

My zipped pouch for the swap and my nametag..


And lastly, working on completing my second table runner for the holidays made with circle appliques. The ornaments were fun and I love their whimsy.

So here are my WIPS for the week, note I have not even started on the Disney stuff ( don't mind me hyperventilating over here..)
For Sewing Summit.. I made my Weekender bag..

My zipped pouch for the swap and my nametag..

What's left? Well I have two days to finish a camera strap and some fun clothes. We'll see what is accomplished..

I've been slowly working on this quilt for a bit. Playing with string blocks and the idea of a deconstructed chevron. In the interest of time though this may end up being a runner or a quilt with *lots* of negative space..

Working on my next collage, which will actually be a series of sugar skulls. P.S. If the skull theme is not your taste, have no fears.. I'll be moving on to my next series in November ;o) I know it's not for everyone, but it is something I've wanted to play with for awhile now..

And lastly, working on completing my second table runner for the holidays made with circle appliques. The ornaments were fun and I love their whimsy.

Starting to wonder how many seasonal runners I will be able to design with just the circles!
What are you working on?
Monday, August 27, 2012
Back To School Dresses

It was impossible to have both girls look in my direction, smile, and not have their dresses flipped over their heads. Alas, it was the first day of school and you HAVE to take pictures..right, right?
Do you like their dresses? They love them and I adore them.. The fabric is Blend designed by the truly amazing Cori Dantini, the line is "Beauty is You". I am crazy about this fabric.. amazing quality, style, and color tones. Couldn't you just see those as an Anthro dress?
The pattern is by the fabulous Jennifer Paganelli - it is the Molly Peasant pattern. Sis Boom patterns are insanely detailed and include tons of sizes. I can't say enough about this pattern. I'm in the process of making two more for a dear friend's angel pie. Love it, love it. You need this pattern.
A few more gratuitous pics of my pretty girls..


Kiddo had a fabulous first day! Yay! Hope your kidlets are enjoying their return to school..
Sunday, July 8, 2012
Quick Gift Idea - Embroidered Hand Mirror & Pouch

I'm still working through my list of gifts that are long overdue. This week I dared to take both girls to Hobby Lobby, I know I'm a glutton for punishment. In the 10 minutes we survived there, I stumbled on to a stash of clearance hand mirrors. They had a garish picture that was falling off from old glue. I bought them all; a smoking deal for some "blank" hand mirrors..
I used the garish picture that was falling off as the template for the new and vastly improved focal art. I decided on some Blend fabric designed by Cori Dantini - "Beauty is You". I love the sweet, sassy girls and thought it would be perfect. I wanted to add some dimension without taking away from the fabric's beauty. Just some hand embroidered hair, accent french knots, and a tiny bit of pink to her lips.
With a bit of jewelry adhesive and a few minutes, I transformed the sad hand mirror into a lovely gift. After another 15 minutes or so I whipped up a coordinating cover for the mirror. A bit of sewn in hook & loop velcro will keep the pouch closed and tidy.
A sweet gift with handcrafted details that didn't take longer then a baby's nap!
Monday, May 14, 2012
Mother's Day Bonanza!
I am incredibly lucky that I was able to celebrate Mother's Day with my parents & family. My mother and I have had such fun all week and we are now counting the days till we leave for Quilt Market. It seemed extravagant to have presents in addition to our fun activities, but we love to make presents for each other.
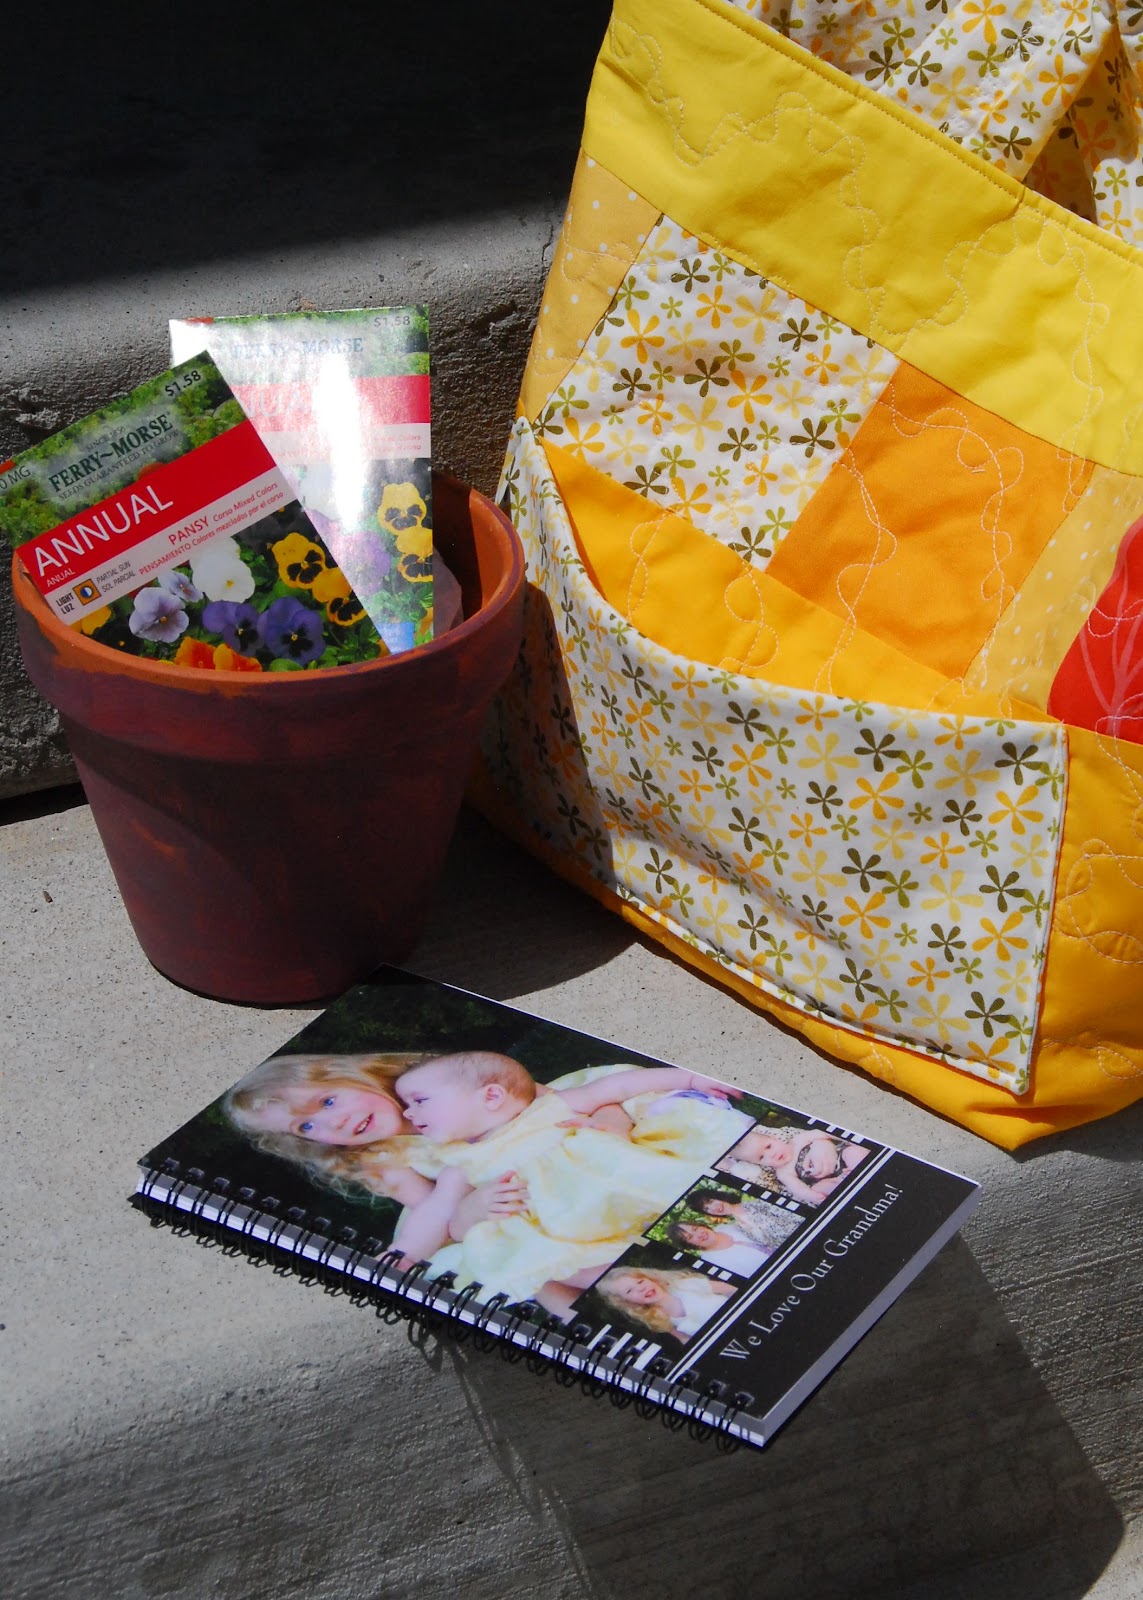
This year I treated my mother to a gardening theme gift...

I found this gardening tote pattern on Sew, Mama, Sew. I *loved* this pattern! It's well written and so much fun. It's perfect for trying a number of fabrics and some room to try a new freemotion quilting pattern.
I think this tote would be awesome for a couple of uses - it has a very sturdy & large inner compartment as well as 3 outside pockets.

Kiddo painted a flower pot and gifted some pansy flower seeds. We also put together a custom notebook from Tiny Prints. The journal was a great deal and I am sure I will be buying some more in the future!

My parents & husband gave me lots of tea related gifts though they didn't collaborate on it. I can't wait to try out my brand new beautiful teapot from my husband & daughters! My mother bought us twin teacups sets - one for each of us. So even though we are separated states away, we can share a cuppa tea together. Aww..
And my favorite gift from my mother of course is one made by her hands..

Love it.. I hung it on my wall about 5 seconds after I opened it...
I hope that you had a wonderful Mother's Day! I hope those that you have loved and cared for gave you an extra bit of sweetness..
This year I treated my mother to a gardening theme gift...

I found this gardening tote pattern on Sew, Mama, Sew. I *loved* this pattern! It's well written and so much fun. It's perfect for trying a number of fabrics and some room to try a new freemotion quilting pattern.
I think this tote would be awesome for a couple of uses - it has a very sturdy & large inner compartment as well as 3 outside pockets.

Kiddo painted a flower pot and gifted some pansy flower seeds. We also put together a custom notebook from Tiny Prints. The journal was a great deal and I am sure I will be buying some more in the future!
My parents & husband gave me lots of tea related gifts though they didn't collaborate on it. I can't wait to try out my brand new beautiful teapot from my husband & daughters! My mother bought us twin teacups sets - one for each of us. So even though we are separated states away, we can share a cuppa tea together. Aww..
And my favorite gift from my mother of course is one made by her hands..

Love it.. I hung it on my wall about 5 seconds after I opened it...
I hope that you had a wonderful Mother's Day! I hope those that you have loved and cared for gave you an extra bit of sweetness..
Thursday, March 22, 2012
Eggcellent Series #5 - Crochet Easter Egg
Thank you so much for joining me this week. I hope you have learned some new techniques and have been inspired to create a pillow. If you have any questions, please feel free to email me any time.
Today I will you show you how to crochet on an applique. However today of all days, because that's how it works, neither of my two sweet kids would nap... so I originally planned to do 3 pillows - 2 bunnies and 1 egg.. and I had time to do the one egg.. Gah! Heartbreaking for me, as I was really excited to bring you this technique. I may revisit it again before Easter with all 3 pillows, photographed beautiful with abundant sunlight. Until then..

Materials Needed:
Plain store bought pillow cover
Scrap fabric for applique
Scrap piece of fusible webbing
Perle cotton - cream and pink
US 7 crochet hook
Embroidery needle
Step One: (Boo.. I know it's the bunny, but I've been working on these all week and thought I would have all three done..) Anywho.. Draw out your applique shape and make sure it will fit on to your pillow cover.


What's coming next week?
I'll share the highlights of some my past Easter projects and show you how to do another crochet/sewing tutorial for a ruffled diaper cover - perfect for spring photo shoots..
Tuesday, March 20, 2012
Eggcellent Series #3 - Are You Good Egg or a Bad Egg Pillows

Materials needed for both pillows:
(2) 14" pillow forms
1/2 yard of linen
1/2 yard of spring quilting cotton
1 yard of light weight fusible interfacing
large scraps of fabric for the faux chenille eggs
(2) invisible zippers
Step One: Cut out (2) 14" squares of linen and (2) 14" squares of the cotton fabric.


Step Five: With an erasable pen, sketch your applique shape on the front cover. Place the faux chenille behind the front cover. You will have the chenille right side up against the wrong side of the linen.


Step Nine: Free motion quilt "the good egg" and the "the bad egg" on the pillow covers.


Step Ten: Install the invisible zippers on the bottoms of the covers. Then pin the front & back covers right sides together. With the zipper unzipped about halfway, sew around the perimeter with a 1/4" seam allowance. Cut the corners up to the stitching line and pull it right side out.
That's it! Super easy and so much fun..
If you like the look of free motion sketching, you have to come back tomorrow! I'll show you how to convert a hand embroidery pattern into free motion, crayon tinted fun..
Sharing this tutorial at:
Friday, March 16, 2012
Plus Kisses Boo Boo Packs - Moda Tutorial

I made these fun boo boo packs for the Moda Bakeshop. It is quick, easy, and if you are like us then you will need several this summer!
I had a question this morning about how long the rice is "good" for. Well.. I haven't issues yet to be honest. We have a different set that is a year old, but I haven't found a need to change it out..
Also, I mentioned in the post that these are great as little heaters while camping. What we do is place them near the campfire (not too close.. my husband has singed his before!) and toss them into the bottom of your sleeping bag. It is truly a wonderful thing to slip into a warm sleeping bag and quickly have toasty toes!
I hope you will check out the tutorial!
Wednesday, March 14, 2012
An Eggcellent Series!
I'm completely obsessed with making Easter pillows right now. Not sure why, but I've decided to run with it.
Next week I will be posting tutorials on how to make several different kind of pillows. I have two faux chenille ones featured below. There will also be a paper piece quilted one and an embroidered lovely. I hope you will tune in and get inspired!
And if you are not sewing inclined, I do have these listed in my Etsy shop now..


Monday, March 12, 2012
The Fight For The Bed
Do you remember a couple weeks ago when I was writing about making Kiddo an American Girl doll bed for her birthday? Well today is her actual birthday and she opened her gifts from us this evening. What I did not expect was that:
1.) Baby would fall in love with the bed
2.) Baby would believe with all her adorable heart that the bed was in fact for her to sleep in...
I bring you the fight for the bed..
Here is Baby getting comfy cozy in the bed upon arrival..

ironically named "Julie"... And I love how she is a doll from the 70's.. it's perfect for the Boho chic bed..

Watch as Baby expertly removes the baby doll from the premises..


All is well again in the Baby kingdom..

Tuesday, February 21, 2012
Bed Fit For A Queen.. Or At Least A Doll..
Kiddo's 4th birthday is just around the corner. I can't believe it. It seems like yesterday she was a sweet little bundle of joy in my arms, and now she's my creative companion most days. We have our ups and downs, but she has won me over heart & soul. For her big occasion, I have it on good authority that she will be receiving her first American Girl doll. And a doll needs accessories, right?
I'm working on a completely decked out doll bed right now - custom mattress, fitted sheet, comforter, pillow..

Isa is not a traditional little girl. She is a solid mix of feminine and tomboy with a WHOLE LOT of boho chic. I'm doing my best to meet her style needs, but she may end up being my toughest client!

*sighs*
Thursday, February 2, 2012
Valentine Sweaters For The Girls

I have been wanting to make the girls special Valentine clothes. It dawned on me after I made my homework for Jenny Doh's class, that my little crochet heart applique would be adorable on a shirt!
There are NO plain shirts at Target, my favorite place to shop with the girls. Not a single plain white, pink, or red shirt in sight.. I couldn't believe it. I ended up getting a matching set of dark pink cardigans. This is actually a better idea since we are still getting snow in Utah.
OK, are you ready to see how it's done? Here we go..
*This project involves basic machine sewing and crochet stitches*
What do you need?
*5" square of fabric (the heart applique)
*starch
* item of clothing to decorate
*pearl cotton, size 5, in coordinating color
*embroidery needle
*size 1 crochet needle (don't be afraid!)
*lightweight fusible stabilizer
*fusible fleece

After lots of starching & ironing, I freehand cut two hearts out (one for each of my girls).


Then cut a small piece of lightweight fusible stabilizer - large enough to cover the size of the applique, but not too much bigger. Place the adhesive side of the stabilizer to the backside of the cardigan, right behind where the applique is going. Iron, iron, iron..
Most likely whatever clothing item you are sewing the applique to, will be a stretchy material - this stabilizer will cut down the curse words you say while you sew.. Don't bypass this step, it is important..

Now with a fairly small zigzag, sew the heart down. You don't want it so small that it doesn't catch the fabric well, but you don't want it too large either. I used a size 3 on my machine and that was pretty close to perfect. I did use white thread, but monofilament is my favorite...


Here it is all done. I think it looks pretty adorable just like that! But I continued on to make it a bit more ruffly..If you want to stop there, just sew in your tails and iron a small piece of fusible fleece on the back of the cardigan, covering your stabilizer and stitches.
If you want to continue..
Slip stitch into your first single stitch; you will be creating a picot edge.
In every single stitch, you will:
slip stitch, double crochet, slip stitch.. all the way around.
It gives it a little bumpy ruffle.
Once you reach the last stitch, slip stitch into the first and sew in your tails.
Iron on a small piece of fusible fleece and you're done!
If you make some, please let me know! I would love to see it..
And if you need clarification on any steps, just let me know..
Subscribe to:
Posts (Atom)

