Showing posts with label blend fabrics. Show all posts

Saturday, September 29, 2012

Hey, Hey We're Monkeys!

Are you ready to see my next project using Sharon Kropp's new line Little Monkey for Blend Fabrics? Earlier this week I did a tutorial on how to create a traditional quiet book, perfect for learning your numbers. But this fabric line is just perfect of course to create a song book for "No More Monkeys Jumping On The Bed"!

It's constructed different than a traditional soft book and will be lots of fun for the older toddlers.

Want to know how much fun.. well you can see my monkeys in action with it here..


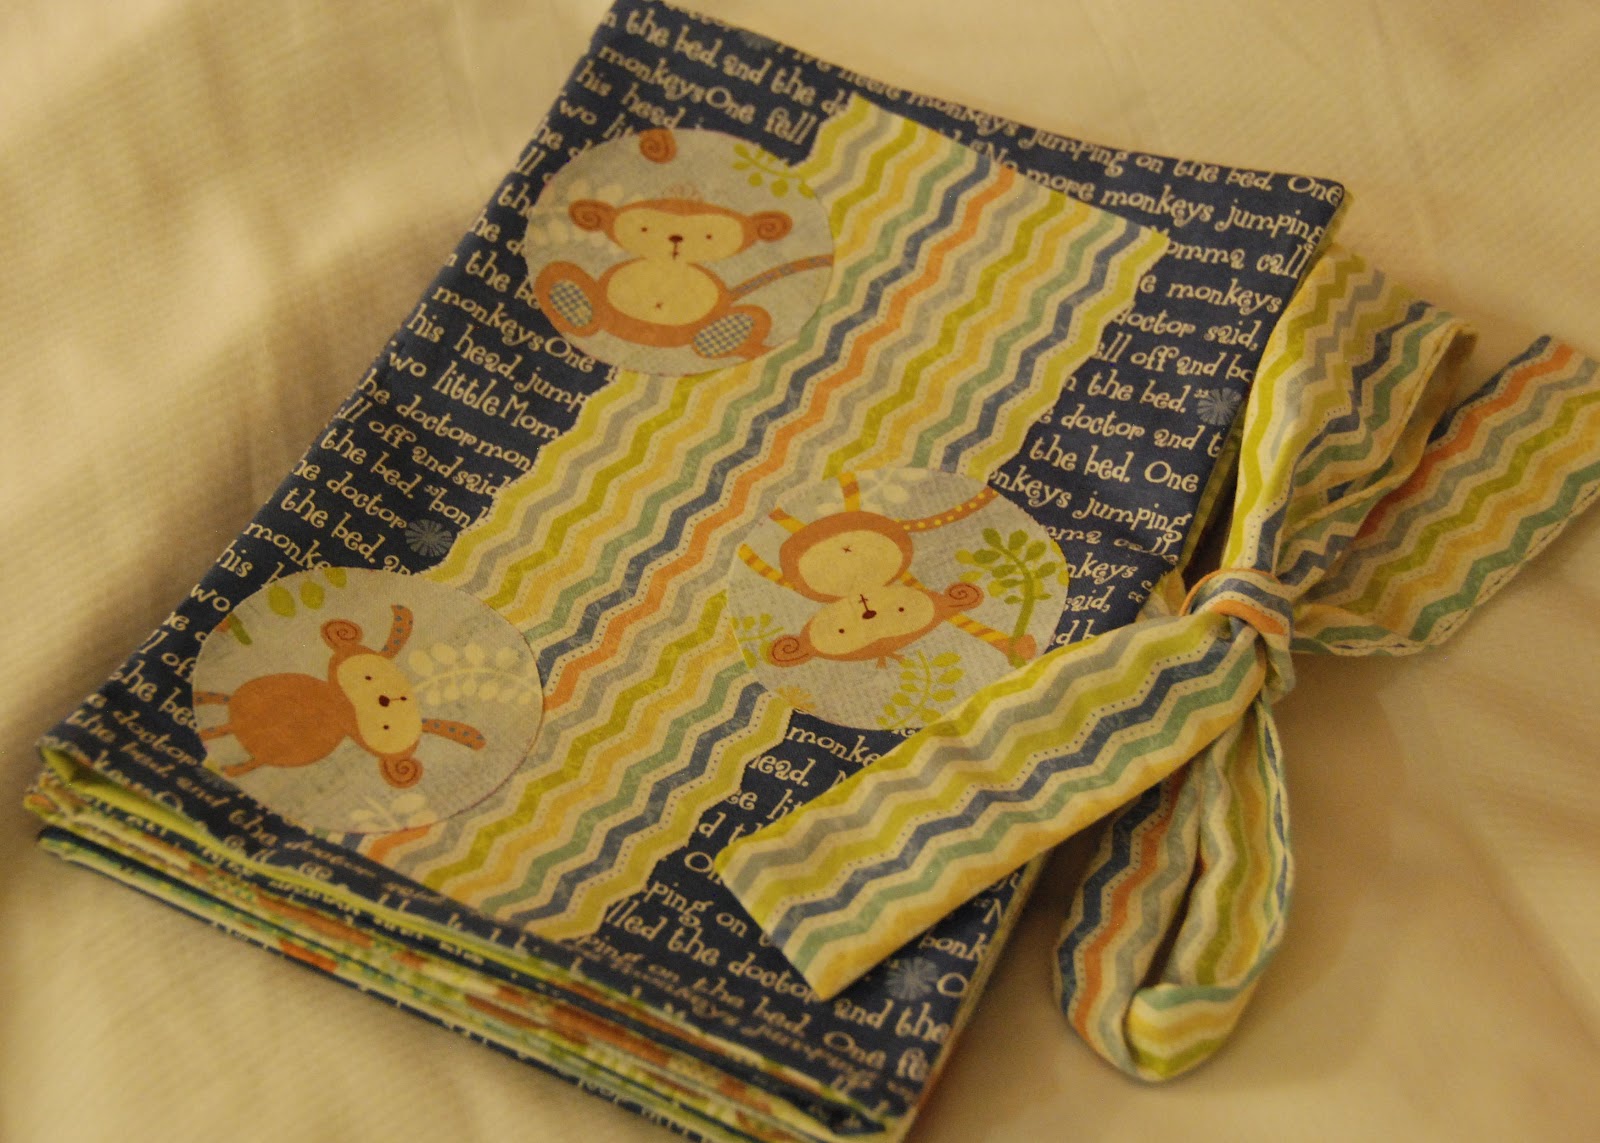
Little Monkey Song Book

Materials Needed:
1 panel of Little Monkey - multi numbers
1 yard of woven, fusible interfacing
1 yard of No More Monkeys - blue
1 fat quarter of Chevron - light blue
scraps of fabric from Little Monkey line
scraps of heavy no-sew fusible web
8 sew on snaps

Directions:
1.) Cut out each of the numbers (0-9) and trim down to 7.5"x 10.25". Cut out 10 pieces of interfacing measuring 7.5" x10.25" and iron on to the back of the fabric numbers.

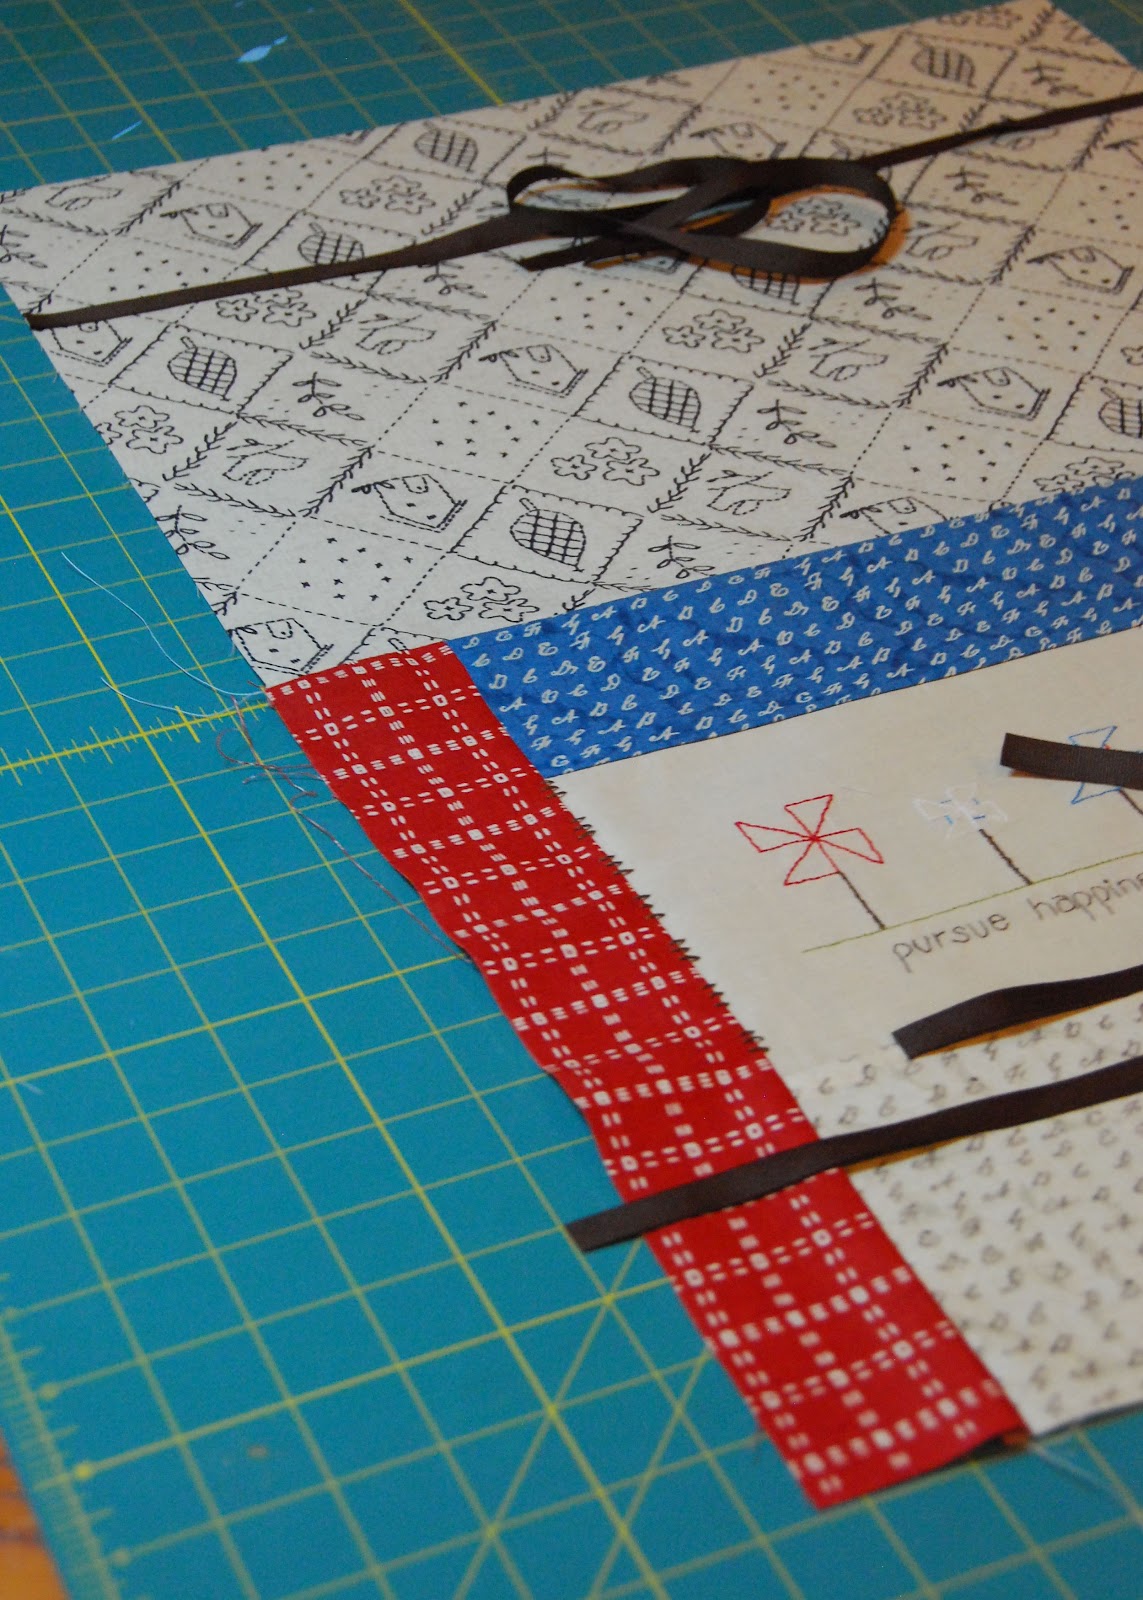
2.) With a 1/4" seam allowance sew the numbers together in descending order (9-0). See reference photo below.

3.) Cut two rectangles out of the No More Monkey blue fabric measuring 10.25" x 35.25". With right sides together, sew the rectangles together to form a piece measuring 10.25" x70". This will be the back panel to your book.
** You could patchwork the back with various fabrics from this line, just be sure your final shape is 10.25" x 70"

4.) Cut four rectangles out of the Chevron fabric measuring 2" x 17.5". Take two of the rectangles and place them right sides together. With a 1/4" seam allowance, sew the two long sides and one short side. Turn the strap right side out and press. Repeat with remaining two rectangles. These will be the fabric ties. Set them aside for now.

5.) Iron on the fusible webbing to the backs of the scrap fabric pieces. Fussy cut out various monkeys and shapes to decorate the songbook cover. See reference photo below. Since it is a heavy duty fusible webbing, you will not need to sew them in place, just iron them on and you're done!


6.) Pin straps on top of the number panel - one centered on either end. Lay the back panel piece right sides together to the number panel (your straps should be sandwiched in between the two panels). With a 1/4" seam allowance, sew along the perimeter leaving a 4" gap. Clip corners up to the stitching line and then pull right side out. Press.

7.) Topstitch the perimeter of the book with a 1/8" seam allowance - this will close your gap and give it a more professional appearance. I also stitched in the ditch between each of the number panels.

8.) Your book is almost completed, to complete the accordion fold out construction, we will now hand sew between the pages. On the backs of each number panel, sew a snap into the top and bottom corner. (See reference photo below)


9.) That's it! The pages will snap together and the book comes together with the fabric ties. Older toddlers will love singing the song, counting the monkeys, and learning fine motor skills with the snaps.


I have one more inspiration project to share with you later this month. An improved quilt built around the number panels. I can't wait to show you!


Monday, September 24, 2012

Little Monkey Counting Book - Tutorial


I really love making my children toys and books. There is something so peaceful about knowing exactly what materials were used. I especially love when I can create a soft, fabric toy for them. My youngest is almost two and still loves to chew and rip books. I was elated when I saw Sharon Kropp's new line for Blend Fabrics, Little Monkey. The line is full of sweet monkeys, chevrons, and more. The numbers panel in particular is quite versatile. I made a counting book, song accordion book, and have an improv quilt in the works. Today I will be show you how to create this fun counting book that is sure to be hit with your children.

Little Monkey Counting Book

Materials Needed:
1 panel of Little Monkey- multi numbers
1 fat quarter of the Chevron - light blue
1 fat quarter No More Monkeys - brown
Scrap of Jungle - light blue
Scrap of fusible fleece
1 yard of woven fusible interfacing

Directions:
1.) Cut out each of the numbers (0-9) and trim them down to 8.25" x11.25".

2.) Cut out (1) 8.25"x11.25" rectangle from each of the two fat quarters - these two pieces will be the front and back covers.

3.)Fussy cut out a monkey from the scrap piece of Jungle and iron on a piece of fusible interfacing to the back of the fabric. Cut a 6" square of Chevron with pinking shears and iron on a piece of fusible fleece to the back of the fabric. Now you will place these pieces on top of the brown No More Monkeys rectangle and free motion applique them in place. If you are not comfortable with free motion sewing, you can of course use a decorative sewing machine stitch instead.


4.) Cut out (12) pieces of fusible interfacing measuring 8.25" x 11.25" - iron these to wrong side of each fabric rectangle. This interfacing will give your book more weight and body. You could use fusible fleece or batting instead, but I prefer the weight of interfacing.

5.) With right sides together, sew the front and back cover along the left long side with a 1/4" seam allowance. See placement picture below.


6.) Continue sewing page panels together in the following order:
0-9
8-1
2-7
6-3
4-5

**If this page construction seems odd or wrong, jump down below to see photos of finished pages**

7.) You are almost done! Now we will complete the page panel construction. First place your front/back page panel right sides together with the 0-9 page panel.


Pin them together and sew along the perimeter with a 1/4" seam allowance - leave a 3" opening.

Clip corners up to the stitching line and pull right side out through the 3" opening. Press and topstitch with 1/8" seam allowance - this will close your opening and provide a nice finished look to the pages.

8.) The second page panel set is 8-1 and 2-7 (see reference photo below). Construct as described in step 7.

9.) Your final page panel set is 6-3 and 4-5 (see reference photo below) and construct as described in
 step 7.

10.) Now you will lay the three completed page panels on top of each other in order.


After carefully lining up the pages, sew a straight line down the center of the seam.


That's it! It makes a fabulous gift for babies and toddlers paired up with a coordinating blanket or quilt.
My Kiddo loved counting the monkeys on each page.


Come back later this week to learn how to create a song book for "No More Monkeys Jumping on the Bed" in an accordion style construction with snaps and ribbon tie.

Monday, August 27, 2012

Back To School Dresses


It was impossible to have both girls look in my direction, smile, and not have their dresses flipped over their heads. Alas, it was the first day of school and you HAVE to take pictures..right, right? 

Do you like their dresses? They love them and I adore them.. The fabric is Blend designed by the truly amazing Cori Dantini, the line is "Beauty is You". I am crazy about this fabric.. amazing quality, style, and color tones. Couldn't you just see those as an Anthro dress?

The pattern is by the fabulous Jennifer Paganelli - it is the Molly Peasant pattern. Sis Boom patterns are insanely detailed and include tons of sizes. I can't say enough about this pattern. I'm in the process of making two more for a dear friend's angel pie. Love it, love it. You need this pattern.

A few more gratuitous pics of my pretty girls..


Kiddo had a fabulous first day! Yay! Hope your kidlets are enjoying their return to school..

Sunday, July 8, 2012

Quick Gift Idea - Embroidered Hand Mirror & Pouch

I'm still working through my list of gifts that are long overdue. This week I dared to take both girls to Hobby Lobby, I know I'm a glutton for punishment. In the 10 minutes we survived there, I stumbled on to a stash of clearance hand mirrors. They had a garish picture that was falling off from old glue. I bought them all; a smoking deal for some "blank" hand mirrors..

I used the garish picture that was falling off as the template for the new and vastly improved focal art. I decided on some Blend fabric designed by Cori Dantini - "Beauty is You". I love the sweet, sassy girls and thought it would be perfect. I wanted to add some dimension without taking away from the fabric's beauty. Just some hand embroidered hair, accent french knots, and a tiny bit of pink to her lips.

With a bit of jewelry adhesive and a few minutes, I transformed the sad hand mirror into a lovely gift. After another 15 minutes or so I whipped up a coordinating cover for the mirror. A bit of sewn in hook & loop velcro will keep the pouch closed and tidy.

A sweet gift with handcrafted details that didn't take longer then a baby's nap!

Sunday, June 24, 2012

The Adorable & Easy Sewing Machine Cover


Lately I'm all about hand embroidery. I love how portable it is; I can work on it for a few minutes throughout the day with the rare moments my crazy girls give me. I originally started this embroidery for the 4th of July, but since I pursue happiness almost daily on my sewing machine, it seemed appropriate. And I loved how this line of Blend fabric designed by Charlotte Lyons coordinates with the patriotic colors.

The embroidery pattern can be downloaded here. I used 2 strands of floss for the pinwheels and a single strand for the grass and words.

This is a super easy project and is fabulous way to showcase a piece of embroidery or some pieces of special fabric. You can create this with a few fat quarters and lengths of ribbon!

1.) Measure your machine from the bottom at the front to the bottom of the back (as seen in picture below), my machine measured in at 27". You will also need to measure the width of your machine, mine was 18".


2.) We will now cut the fabric for the inside of the sewing cover. Cut your desired fabric a 1/2 larger than each measurement you just calculated. So, my inside fabric was cut 27.5" x 18.5". I choose to use muslin fabric, but you can create this to be a reversible cover.

3.) The back of my fabric was a single piece of fabric - that was cut to 18.5" x 14".


4.) Now depending on your machine size, your final measurements for the front of your cover will vary, but I will show you my layout for your reference. The measurements listed include a 1/4" seam allowance and were pieced in alphabetical order.


5.) Once the front is pieced, you will need to sew the front and back of the top together (see picture below for reference.) Now you have a completed top piece that should measure 27.5" x 18.5"


6.) Before I completed the cover I added just a little bit more embroidery on the cover as seen below.


7.) Now we will need to prepare our ties for the sides - cut (4) lengths of ribbon 20" long. You will pin these 4" up from each corner.


8.) Now place the two fabric pieces (inside and outside cover) right sides together, lining up the corners, and pin every couple of inches. **Be sure that your ribbon pieces are sandwiched between the two layers**.


9.) With a 1/4 seam allowance, sew along the perimeter of the cover.***Leave a 3-4" gap to turn it right side out*** Clip corners and turn.

10.) Give it a nice hot press and top stitch around the perimeter. Enjoy and pursue happiness!


If you have any questions or you spot an error (ack!), please feel free to email me at allthingsbelle@hotmail.com

I would love to see if you make one!

Thursday, June 21, 2012

Peek at the Sewing Machine Cover Tutorial


Tutorial & embroidery pattern coming this week!

Thursday, June 14, 2012

Blend Fabrics

I have been a huge fan of Anna Griffin  for many years. My mother & I would sign up for any scrapbook/paper art class of hers that we could find. I was so excited when I found out that she had moved into fabric. We always haunt her booth at Quilt Market; it's always full of such loveliness and amazing inspiration.

At this past visit to Quilt Market, while I was fondling Anna's new fabric line, I had a wonderful conversation with Joe Spiegelberg. I learned all about their new venture, Blend Fabrics. I can't say enough amazing things about their lines of fabric. The designs are fresh and come from so many talented artists. I literally jumped at the chance to be able to work with them.

This past week I whipped up several napkins with the "Walnut Hill Farm" line designed by Charlotte Lyons.


Aren't these lovely? I think they would be amazing for a country BBQ or a spring wedding. Her designs are full of  homespun artsy charm. The fabric is a very high grade cotton and such a dream to work with!


My mind is busy with ideas and I can't wait to share more with you! From quilts to sweet dresses.. there is more coming your way..

.

Related Posts Plugin for WordPress, Blogger...