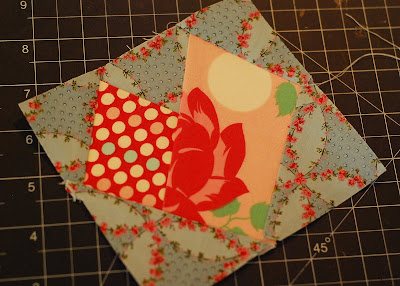
Today we are going to make a very easy peasy heart mini block. You can make this into a little pillow, mini quilt, potholder..and the list goes on!

What do you need?
*scrap fabric
*copy paper - for your printed pattern
*old credit card or something of that shape & weight
*rotary cutter
*cutting mat
*extra fine seam ripper
*tape
*iron
* add a 1/4" ruler
*tweezers
*glue stick

How do you do it?
1.) Print out this pattern - you can download it here. Keep in mind that your finished project will be a mirror image of your pattern. Now because this is an easy pattern, all the piecing will be done on the same page. With more complex patterns, you would have to cut apart main sections to complete and then sew together.
2.)In paper piecing we work in numerical order, so the first section we will do is #1. Pick a scrap piece of fabric that is at least 1/2" wider then section #1. Place the printed side of the paper down on the table. Add a dab of glue stick to the wrong side of the fabric and adhere right side up on the back of the paper - centered into section #1. It helps to hold it up against the light to make sure you have placed it correctly.

3.)Now before we begin sewing, decrease your stitch length somewhere between 1-2. This shorter stitch will make it much easier for you to tear the paper off later. You will not be removing paper until the very end.

4.) With the printed side of the paper facing up, fold back the line between #1 and #2. Using your add a 1/4" ruler, trim the seam allowance to 1/4". You can discard the excess fabric or save for another project. Unfold the pattern.


5.)We will always be sewing on the front side of the paper and laying fabric down on the back. Now find a fabric scrap that fits at least a 1/2" larger than section #2. Place this fabric down on section #1, right sides together with raw edges matching up. Hold or pin in place and turn the paper back over with printed side facing up. You will now stitch right on the line between section #1 and #2.


6.) Gently press the fabric open with an iron.

7.) Repeat step #4 for the section 2 borders. Find a suitable piece of fabric for section #3 -remember that your fabric can be scraps, but they must be 1/2" larger than the printed area. This is the most common step people have trouble with because they use too small a piece of fabric. It is much easier to cut away excess that to start over or to rip the itty bitty stitches..
8.) Place the #3 fabric right side down on section 1&2 - rights sides together with raw edges lined up. Again making sure that when fabric is folded back over it will completely cover the #3 section with room to spare. Hold or pin in place and flip over to the printed paper side. Sew on the #3 / #1 border. Press fabric open.

9.) Now repeat those steps for the remaining sections...
 More pressing...
 More cutting..
 TADA! All done - whew! That was easy, right? Now you can gently remove the paper from the back. Use your tweezers to help remove small pieces in the stitches. Your project is now reading for finishing. I think this would be an adorable little sachet pillow.
There are so many fun things you can make with paper piecing. You will love and be amazed at the easy precision. You can find more free paper piecing patterns at my blog over at All Things Belle and ones to purchase on my Etsy store.
Thank you so much for joining me! I hope I have removed some of the mystery of foundation piecing and have you excited to go try it.


