Showing posts with label artist. Show all posts

Saturday, May 16, 2015

Inside the Sketchbook

Some of the pieces I have been working on in my sketchbook...


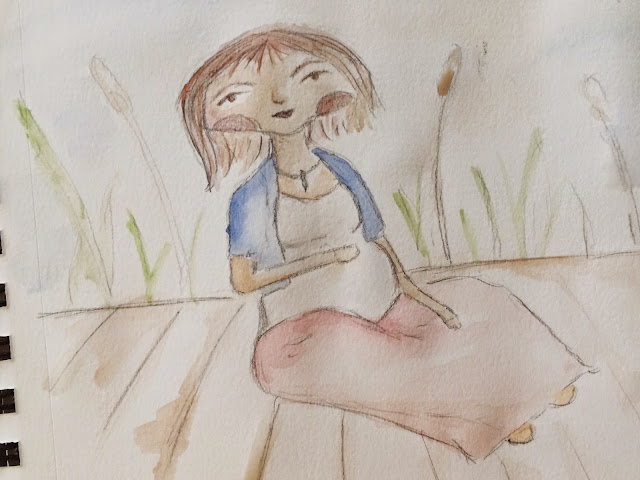
This was for the daily prompt of - Mom. It's a watercolor based off my last maternity photo shoot.

This one I chose to do on a canvas with acrylics. It's titled "Yesterday" - a nostalgic memory to keep the wonder of childhood alive. It will be listed in my Etsy shop next week.


A different style for the daily prompt of something that starts with the letter L. In the end a lot of people choose a lion. This was a watercolor and pen sketch in the sketchbook.


 A watercolor and pen commentary on social media for the prompt of reward. In the end only we know if we have bent our personalities to fit a mold. It's something I fight against on a regular basis.


And this last piece is in progress. A tiny vignette of retro Disneyland was more work than I anticipated - lots more more layers and details to do, but it does make me happy. 


Sunday, January 12, 2014

Small Town Church - First Art Quilt of 2014


On the way to work a few weeks ago, I drove past this small Presbyterian church in Magna, UT. Its beauty struck me and I literally had to pull the car over to snap a few pictures on my phone. The lines are so clean, the colors so bold and true. I loved the modest and perfect beauty of this home of worship. It is in stark contrast to the huge and somewhat glamorous temples that are so commonly linked to the state of Utah. I knew immediately that I wanted to create an art quilt of this image.

Wouldn't you know it, the next week Project Quilting started up again. The first challenge was to create a quilt with fabric strings (fabric no wider that 2.5" across").


I roughly sketched out an idea of the quilt on graph paper and began slicing up the fabric I wanted to use.


I then glue basted all the strips on to muslin. After fussing, snipping and finally completing the layout, I then basted a grey felt back and a white, small weave tulle on top. Why the tulle? Since I don't use fusible webbing, the fabric can begin to lift. If I quilt with a discreet tulle layer on top, it keeps the fabric laying down.


And this is the final quilt; it is approximately a 20" square. I am shipping it off this week for consideration in a publication and upon its return, I will donate to the church. Maybe they would be happy to display it?
Here are some detail pics..


I've really embraced what I considered to be my "style". I am not fully abstract nor am I a realist artist. I truly like to focus evoking an emotion and giving more of a memory of an image, rather than an exact replica.

xo,
Jenny

Wednesday, December 18, 2013

Cold Porcelain - Recipe, Tips and a Christmas Ornament

When I first began searching Pinterest for clay ideas, I ran across one called "cold porcelain" a few times. For some reason, the name kind of rubbed me the wrong way and I didn't pay it too much attention. I think I randomly categorized it as a child's clay or a play-dough alternative. And well, it can be those, but it is also an amazing air dry clay that you can create for just a few dollars and it is very versatile! I created the mended heart in the ornament above from it. I'm going to tell you how to make it and give you some tips along the way.

To make cold porcelain you need:
1 cup of corn starch
1 cup of school glue 
(if measuring glue sounds fun, let me spare you some messy grief.. you basically need 2 full bottles of the regular sized glue as show below)
1 Tbsp lemon juice
2 Tbsp mineral oil, or baby oil, or a kitchen oil
(i was given a ton of baby oil with all three of my babies and i never use it on them - so that is what i used)
Lotion - for kneading

*This is a microwave version, you can absolutely cook it on the stove over low heat. Whatever utensils and/or pots that are used, please use them for crafts only and do it use them for food.


1.) In a microwave safe container, mix the glue, oil, and lemon juice together with a disposable spoon. Then add the corn starch and carefully mix together until well blended. It will resemble something like curdled cream.

If you have children that love to help, this is the best step for them to be involved.

2.) Place the mixture in the microwave and heat for 30 seconds. Quickly take it out and mix it well with your spoon. You will do this a couple of times.

How long? Well.. a number of recipes I found on the internet gave me all sorts of intervals and it always undercooked my clay. Here is my advice, you need to pay more attention to what the clay is doing rather than how many times it has been in the microwave. The clay will be ready when it is pulling from the sides of the container, it will have a matte sheen and hold a stiff peak. It roughly takes me 2 minutes total, but please pay more attention to the clay then time.

3.) Once the clay is well cooked, it will be super duper hot. Like Hades hot.. and you have to knead it. Don't let the kiddos help with this. Cover your hands well with lotion - this help the clay from sticking to you and it helps with the intense heat of the clay. Knead, knead, knead. You can do it on a lotioned up piece of saran wrap as seen below. Your clay will have a delightful, slightly elastic texture to it. Wrap it up in the saran wrap and place in an air tight container. Let it rest overnight in the fridge and you can play with it tomorrow!


Since this is an air-dry clay, you must try to keep it wrapped up tight. It can last for several weeks if well protected.

It will dry completely in 24-48 hours. Don't try to manipulate it during the drying process or it will become vulnerable to cracks and breaks.

It will be a translucent cream when dry unless you add pigment to it. You can color it with acrylics, oils or chalks. You can also paint it after it has dried. The heart I created was painted after the drying process.


Since this is an air-dry clay, there is considerable shrinkage during the drying process. I've never had a piece crack or break, but your optimum minimum thickness in my opinion would be 1/8-1/4" thick. Definitely something to consider if you like to use an armature. I am happiest with its use in molds or moldings without armatures.

It is a great clay to play with and because it is so relatively inexpensive, this is a great clay to use with children. I think it has amazing potential for more sophisticated art pieces as well.

I hope you will give the recipe a try and please let me know if you have trouble. My first batch was a messy, gigantic failure that occurred right before the baby woke from a nap. FUN! And if that happens to you, just try again. The biggest piece of advice I can give you is to really mind the consistency changes of the clay during the heating process. You want it matte, pulling away from the container and stiff peaks!

Happy holidays!
xo,
Jenny
Monday, May 6, 2013

Nesting - Nursery Projects and Watercolor Fun

I apologize for the lull, it has been crazy here nesting and getting ready for Little Man. Baby Girl started to come 6 weeks early and I just knew this pregnancy would be similar. Sure enough, we are 6 weeks out and I'm already dilated and effacing a bit too quick. Eek!

Even though the blog and Facebook page have been quiet, I've been quite busy with projects, artistic experiments and enjoying the start of our summer.

I will write a full post on Little Man's nursery projects once they are all finished. Here are some sneak peeks..


When I'm not working on projects for Little Man, I've been playing with watercolors. I figure that maybe the easiest way for me to create for the first couple months after his delivery.


What's next? Little Man's induction is on June 17th and we're hoping he will stay put till then. I'll be guest curating on the amazing Jenny Doh's site, Crescendoh, this summer. I will have my first solo art display at the Sandy library in September. And I'm still waiting to hear if I was accepted at Craft Lake City.

For now I'm not accepting or seeking any teaching opportunities. The rest of 2013 will be centered on finding the balance in our family with our sweet little boy, gearing up for homeschool and enjoying these rare moments. In those quiet times, I'm eager to find my artistic voice and settle down with a few choice mediums. I hope that in 2014, I will be able to break open some doors with my art, embrace our homeschool lifestyle and find new ways to inspire others as well as connect with my fellow artists. There will be some blog and Facebook lulls while we adjust, but I hope you will stay connected with me as we enjoy this last chapter of babyhood.

.

Related Posts Plugin for WordPress, Blogger...