Showing posts with label 4th of july. Show all posts

Wednesday, July 3, 2013

Celebrating the 4th of July

Our days and nights have been full with enjoying our little family. Father's Day was especially sweet with the arrival of our little man, but I wasn't able to do everything I wanted to for my husband and father. I'm scaling way back in my expectations of what I can accomplish in a day. However, my sweet Kiddo is an aspiring "Martha Stewart" at age 5 and really wanted to celebrate the 4th of July with decorations and more. Luckily it only takes a few extra touches to make her smile..

A sweet little star garland in our front room..

A little door decor..

When you're 5 years old (or 35), crepe streamers can make any holiday festive..


I let Kiddo go crazy picking daisies from our garden to adorn the front porch..

Lots of red and blue treats for the day! 

Fun food picks for our BBQ.. 

We are so thankful for all those Americans that fight for our freedom! I hope you and yours celebrate a safe and fun 4th of July!!

Are you looking for some more patriotic ideas?
Come see my free pattern for this paper pieced mug rug..


Sunday, June 24, 2012

The Adorable & Easy Sewing Machine Cover


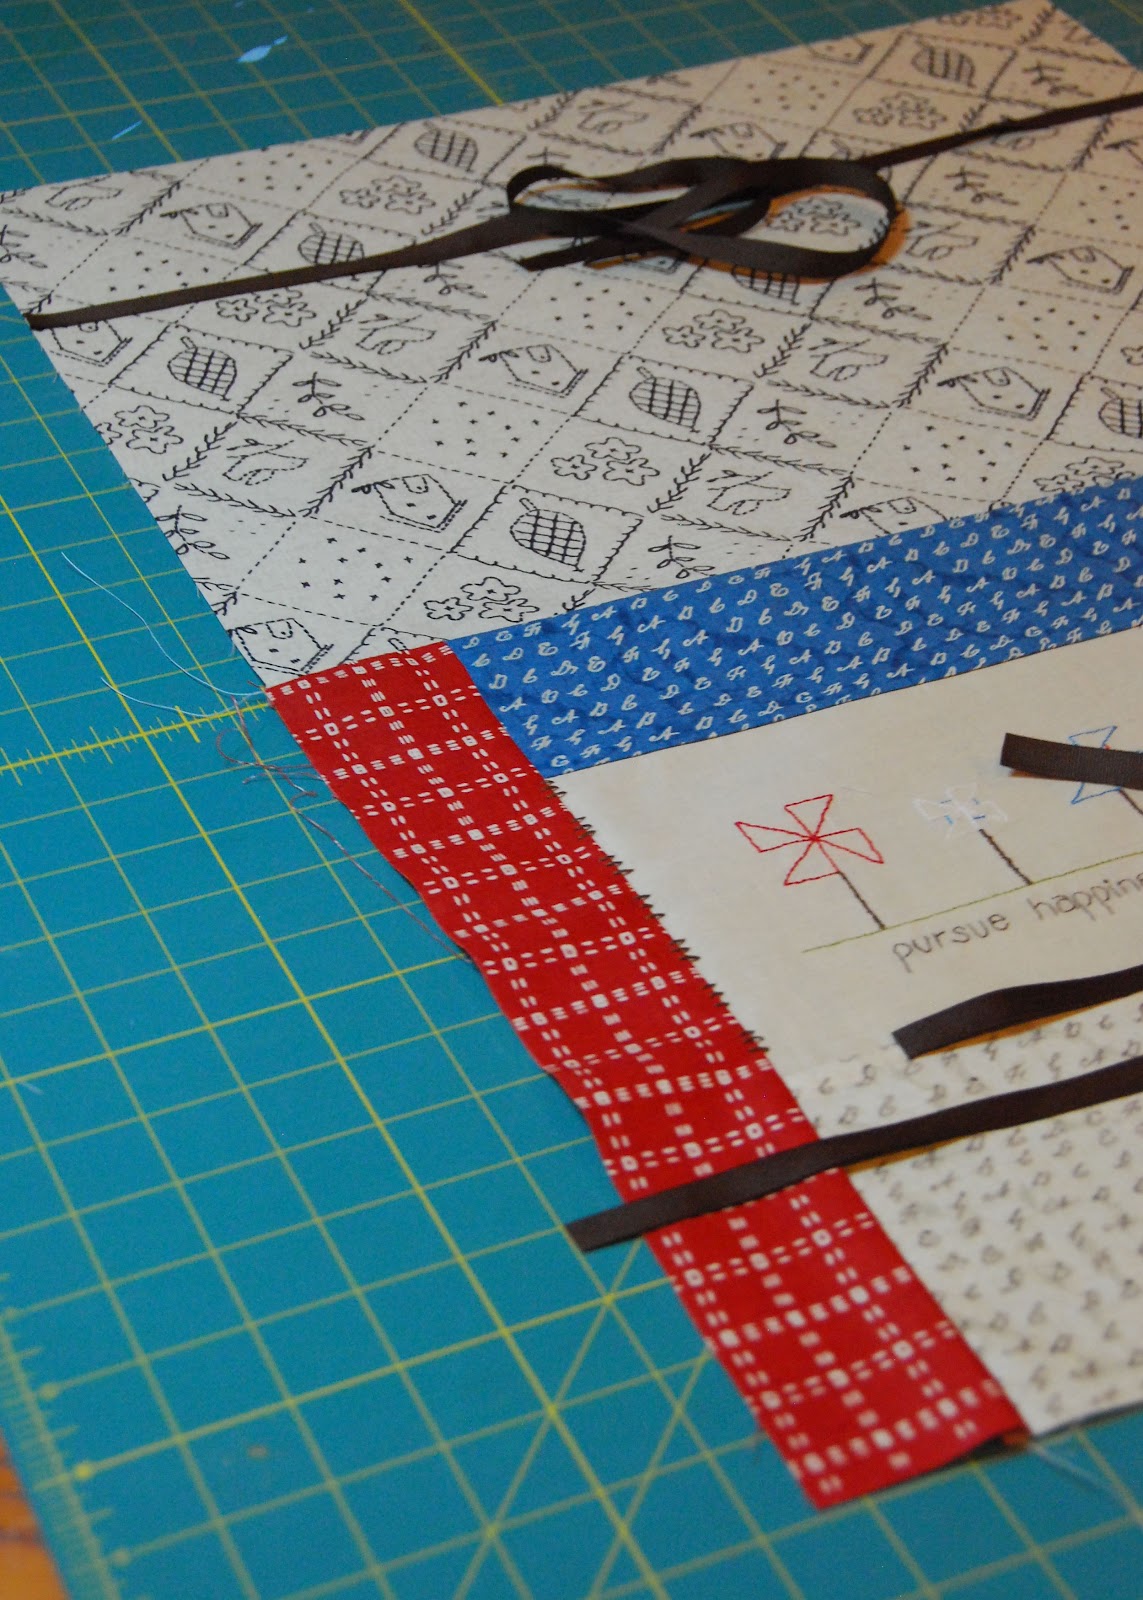
Lately I'm all about hand embroidery. I love how portable it is; I can work on it for a few minutes throughout the day with the rare moments my crazy girls give me. I originally started this embroidery for the 4th of July, but since I pursue happiness almost daily on my sewing machine, it seemed appropriate. And I loved how this line of Blend fabric designed by Charlotte Lyons coordinates with the patriotic colors.

The embroidery pattern can be downloaded here. I used 2 strands of floss for the pinwheels and a single strand for the grass and words.

This is a super easy project and is fabulous way to showcase a piece of embroidery or some pieces of special fabric. You can create this with a few fat quarters and lengths of ribbon!

1.) Measure your machine from the bottom at the front to the bottom of the back (as seen in picture below), my machine measured in at 27". You will also need to measure the width of your machine, mine was 18".


2.) We will now cut the fabric for the inside of the sewing cover. Cut your desired fabric a 1/2 larger than each measurement you just calculated. So, my inside fabric was cut 27.5" x 18.5". I choose to use muslin fabric, but you can create this to be a reversible cover.

3.) The back of my fabric was a single piece of fabric - that was cut to 18.5" x 14".


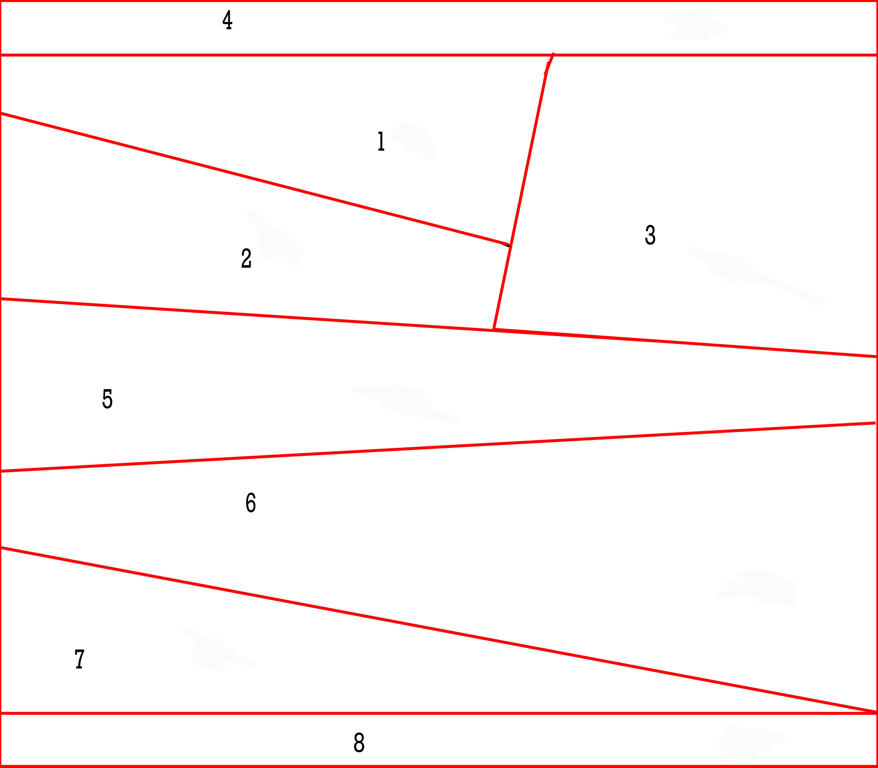
4.) Now depending on your machine size, your final measurements for the front of your cover will vary, but I will show you my layout for your reference. The measurements listed include a 1/4" seam allowance and were pieced in alphabetical order.


5.) Once the front is pieced, you will need to sew the front and back of the top together (see picture below for reference.) Now you have a completed top piece that should measure 27.5" x 18.5"


6.) Before I completed the cover I added just a little bit more embroidery on the cover as seen below.


7.) Now we will need to prepare our ties for the sides - cut (4) lengths of ribbon 20" long. You will pin these 4" up from each corner.


8.) Now place the two fabric pieces (inside and outside cover) right sides together, lining up the corners, and pin every couple of inches. **Be sure that your ribbon pieces are sandwiched between the two layers**.


9.) With a 1/4 seam allowance, sew along the perimeter of the cover.***Leave a 3-4" gap to turn it right side out*** Clip corners and turn.

10.) Give it a nice hot press and top stitch around the perimeter. Enjoy and pursue happiness!


If you have any questions or you spot an error (ack!), please feel free to email me at allthingsbelle@hotmail.com

I would love to see if you make one!

Thursday, June 21, 2012

Peek at the Sewing Machine Cover Tutorial


Tutorial & embroidery pattern coming this week!

Sunday, June 5, 2011

Modern Flag - Mug Rug Freebie Pattern

To kick off my pattern debut on Etsy, I'm offering a free pattern for this mug rug. This is a great introduction to paper piecing. Please only use this pattern for personal or charitable use. Also, it would mean so much to me if you would follow my blog if you like my freebies!

Let me know if you have any questions about paper piecing! I'm soo addicted. Designing these patterns is the perfect combination of creativity and logic. I hope you love it too!
If you love the mug rug, but don't want to make it - I'm selling this one in my Etsy store here. It will probably be the only one of this style I make.. Just too many ideas and not enough time..

First Pattern For Sale & Free Tutorial

I'm going to be listing the Patriotic Pennants - paper pieced pattern is for sale . I'm very excited to be starting this new adventure. I have so many ideas and lots of designs to share. If you ever have any questions or design suggestions, please let me know!

Prim Patriotic Banner
You will need
- an odd number of completed paper pieced pennants from the pattern
- a couple yards of 2" wide coordinating ribbon or fabric
- burlap scraps larger than your completed pennants

1.) If you have not already done so, carefully remove the paper
foundation from the back of the pennants.

2.) Trim pennants down to exact size -
you will not need the 1/4" seam allowance for this project.

3.) Pin a pennant on to a piece of scrap burlap -
make sure you have at least 1/2" border of burlap on all sides.

4.) Sew pennant to burlap, stitching with 1/4" seam allowance.

5.) Trim burlap giving the pennant about 1/2" border.

6.) You can either run your ribbon/fabric string
through your ruffler foot at level 12
or run a long basting stitch down the center and hand gather.

7.) Arrange pennants on ruffled ribbon/fabric and pin in place.
Stitch in place.

That's it! Super easy and such a great prim touch for the holidays.
Have questions?
Let me know!

Linking up to:

.

Related Posts Plugin for WordPress, Blogger...